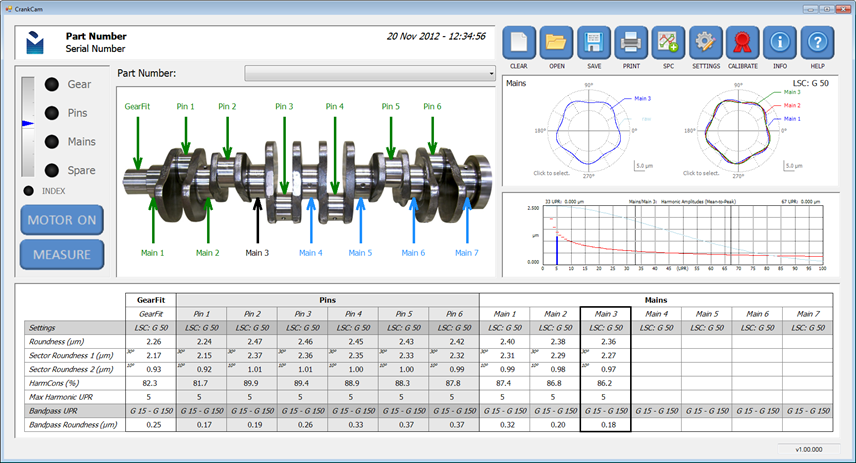
A crankshaft manufacturer was looking to improve measurement of roundness, sector roundness and harmonic frequencies. The method being used only allowed single measurements, and the probe hardware was unable to produce good frequency response measurements.
Working with an instrumentation/electronics firm we combined the existing measurement probes with improved hardware to accurately measure harmonic frequencies. Our software guides the operator through the measurement locations, presenting the results in an easy-to-read tabular format, along with an image of the measurement locations for quick cross-reference. The operator maintains control to re-measure at any location that may have been compromised by dirt or other issues.

This project highlights Digital Metrology’s ability to work with hardware and sensor companies to efficiently, and cost-effectively, improve existing measurement processes and data.
Created in collaboration with Michigan Engineering Associates
