Optical measurement of surface texture is becoming more and more widespread, and new technologies are providing faster measurement of larger areas. However, in the quest to measure faster over larger areas, we sometime lose touch with the ability to resolve smaller features.
Most of the time there are hints at performance in the measuring system’s specifications. However, when you’re trying to compare two surface texture measurement systems the specs can be overwhelming, and they may not even report comparable features.
Fortunately, there is a quick and easy way to compare resolutions and fields of view for different technologies: and it will only cost you a penny.
Why is a penny a good artifact?
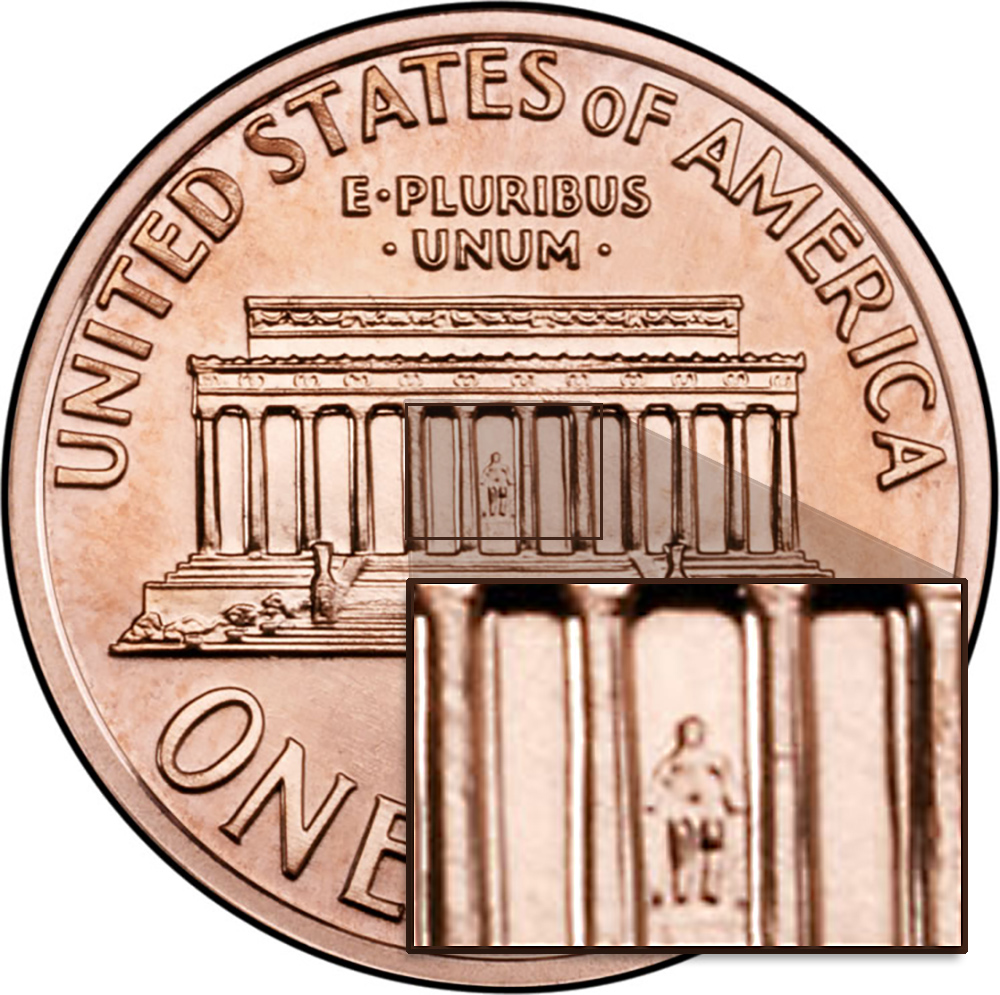
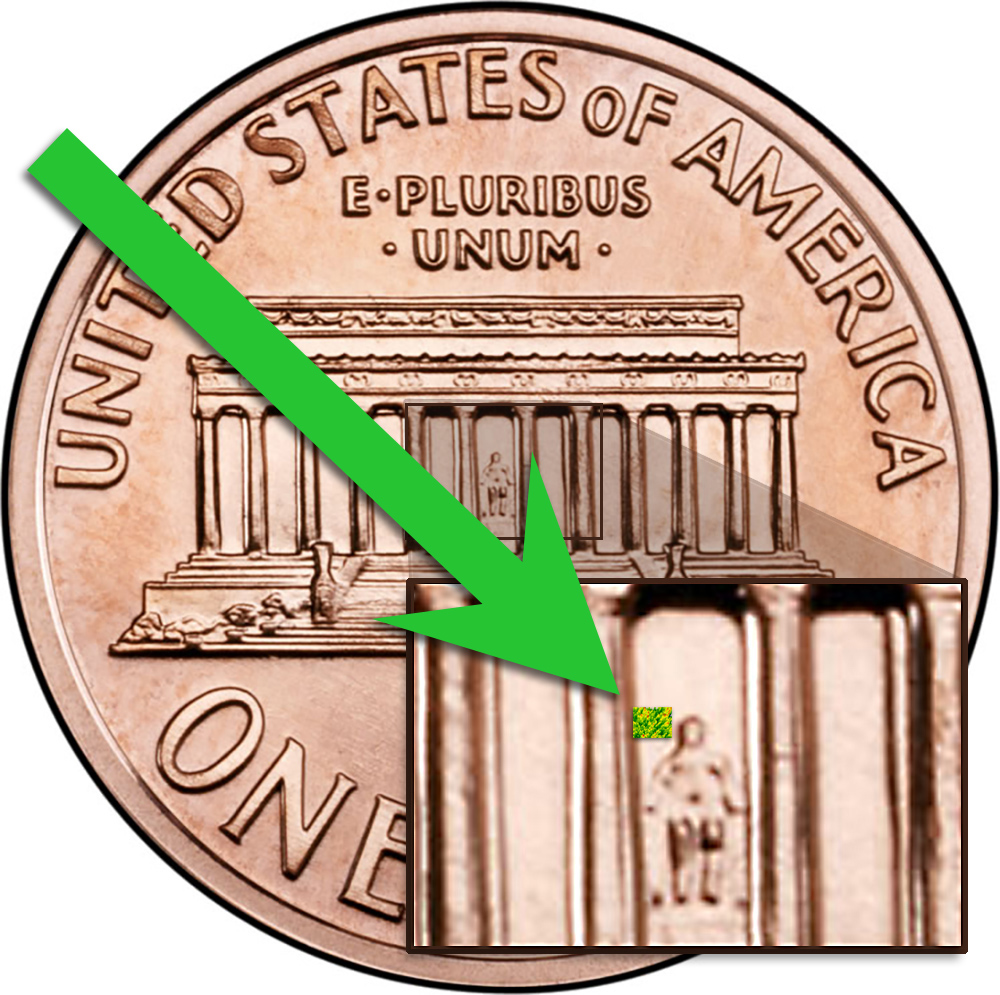
One of my favorite measurement artifacts is a pre-2009 United States penny. On the back is an image of the Lincoln Memorial, and between the columns sits a very tiny Abraham Lincoln.
The columns in the image are approximately 80µm high and 1.1mm apart. Lincoln’s head is approx. 250µm wide and 16µm high.
The penny provides an easy visual reference as you are considering which measurement technology to apply for an application. If you can measure Lincoln’s head clearly, then you know that you will be able to resolve lateral dimensions on the order of 250µm, or 1/4 mm. If you can’t resolve Lincoln’s head, then you can’t measure features that small (or roughness consisting of features on that order).
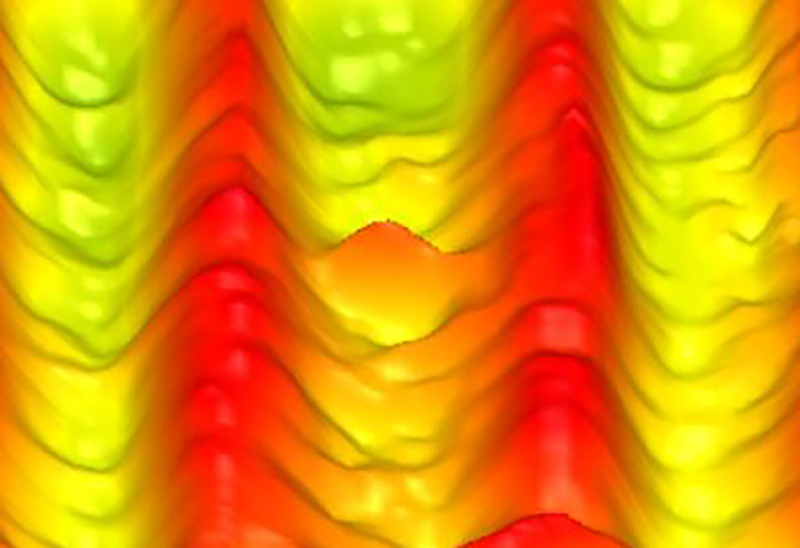
The “penny artifact” is also a helpful way to communicate measurement capabilities to designers, engineers and management. If you know the size of the features being measured, it is easy to relate them to features on a penny. For example, when we see a 3D (areal) dataset on the screen, it can look like a vast terrain, made up of many features: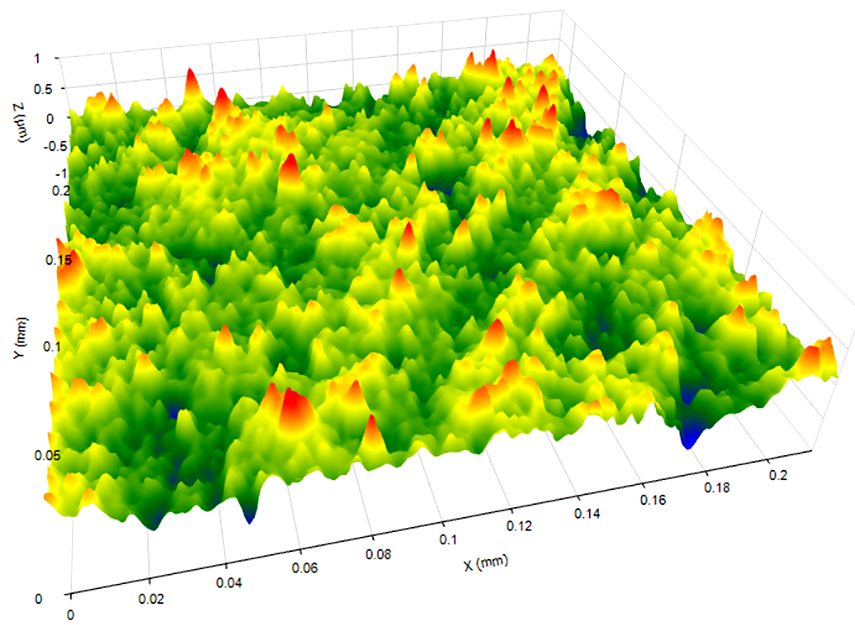
However, if we compare the size of this dataset to the features of a penny, we immediately get a sense of the size of the measured area (field of view) relative to the world we live in:
Finally, the penny is a good gut check as to whether a measurement system is functioning as expected. Should we be able to image Lincoln…and can we? Or, conversely: if we are seeing unexpected texture in our data …can we trust that it is real, or might it be an artifact of the measurement system?
Comparing some actual systems
Measurement systems are designed to fulfill different functions, which means their designers make tradeoffs to optimize for lateral and/or vertical resolution, field of view, measurement speed, portability, etc. As a result, many measuring system configurations are available, each with its own strengths. The proper measurement system should be selected based on its ability to resolve your features of interest.
Let’s see how some typical systems (using various imaging technologies) perform with the penny measurement test.
3D Laser Line scanner
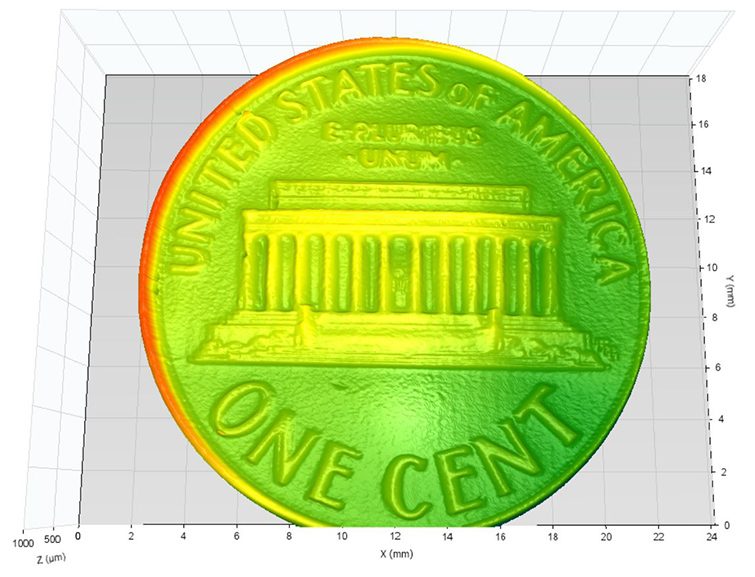
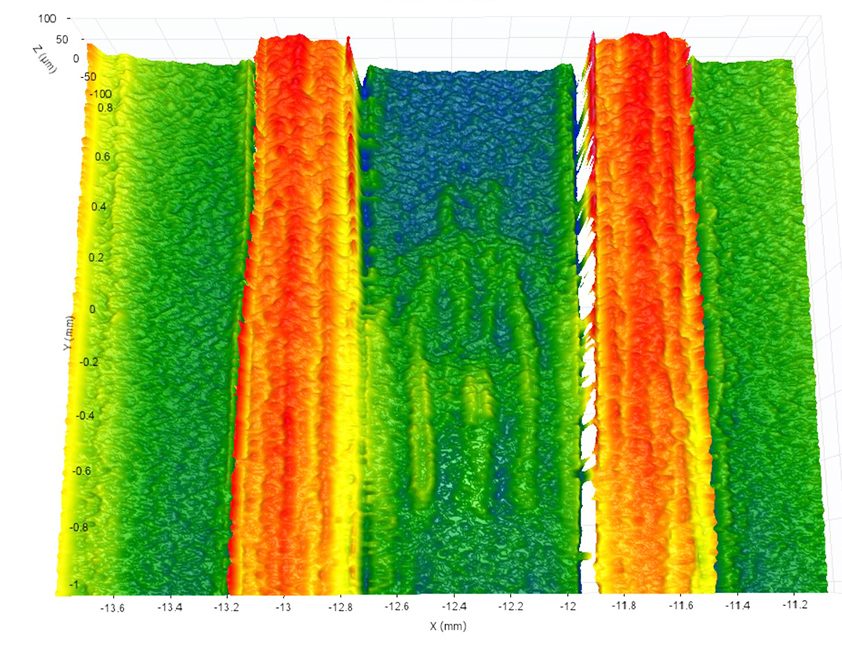
A laser line scanner mounted on a 3D measuring arm can provide quick measurements for 3D shape reconstruction. It’s fast and flexible, so you can model complex shapes quickly. But the scanner’s lateral resolution is limited – particularly in the context of surface texture. How much “texture” can the laser line scanner see? The penny can help us quickly visualize the system’s performance. Here is a scan of the entire penny surface, shown in OmniSurf3D software:
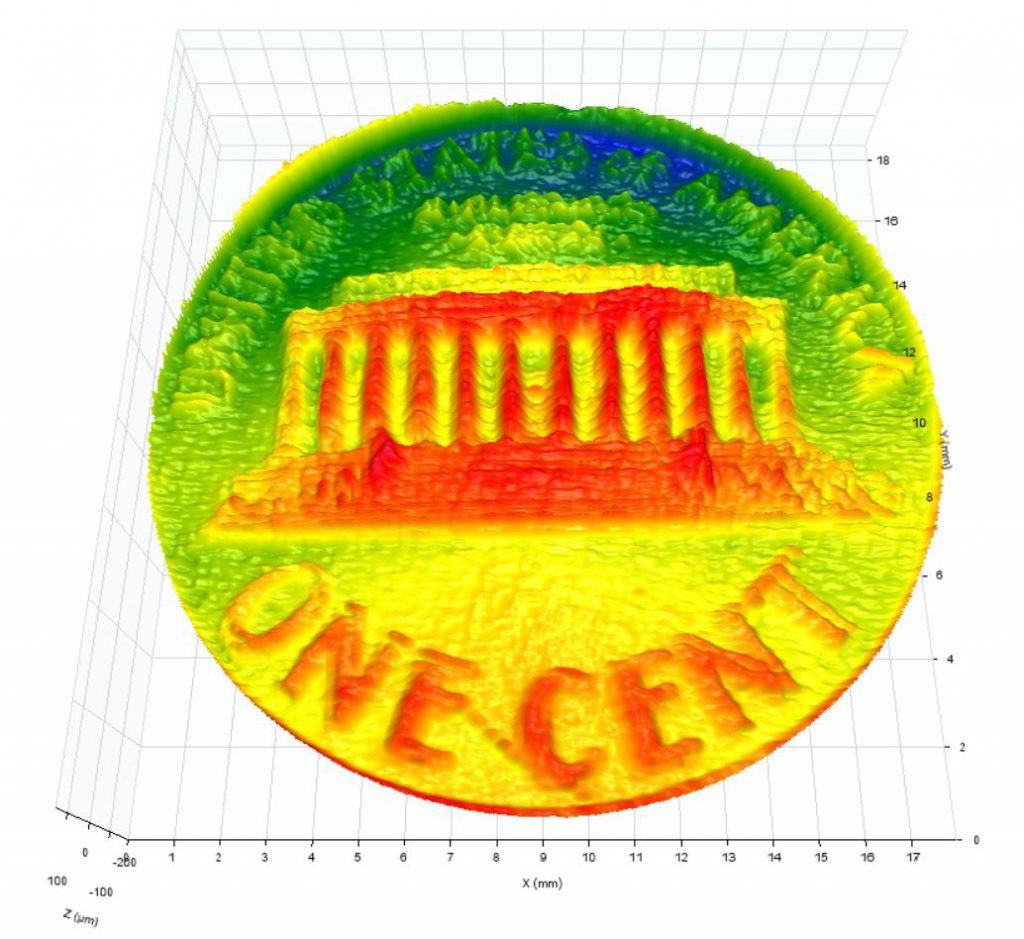
If we zoom in on the area where Lincoln is sitting, we can resolve the columns, albeit with significant, ridge-like artifacts. Unfortunately, our 16th president is just a blob:
Structured light system
Structured light systems project one or more measurement “beams” or patterns, then reacquire these shapes as they are reflected from the test part. By analyzing the difference between the original and reflected beams the system can reconstruct the surface in 3D. These non-contact systems can acquire relatively large fields of view (up to 10s of square millimeters) in a few seconds.
With structured light systems we can easily acquire the entire surface of the penny in just a few seconds:
When we zoom in, there appears to be better definition than we had with the laser line scanner:
However, we have a few problems here. For one, the data shows ridges in the columns which are not present in reality. And, while Lincoln is present in the image, the features are still poorly defined—we are at the limit of this system’s lateral resolution.
Scanning, White-Light (Coherence Scanning) Interferometer
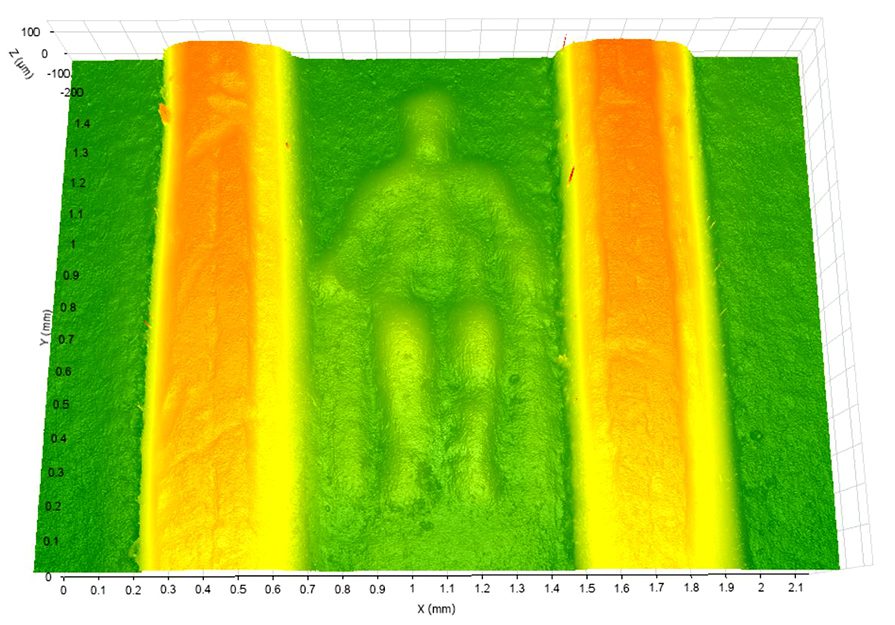
These systems use interferometry to obtain high resolution, 3D images of surface texture. Here is an image of Lincoln and the surrounding columns obtained from a coherence scanning interferometer:
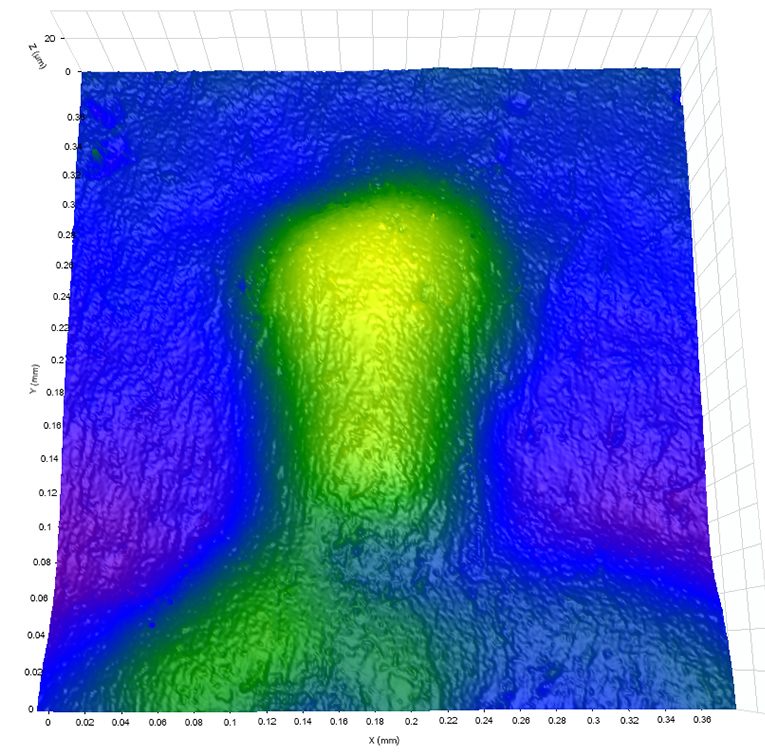
Lincoln has finally come into focus! More important, the system has sufficient resolution to let us accurately measure the columns, and his head:
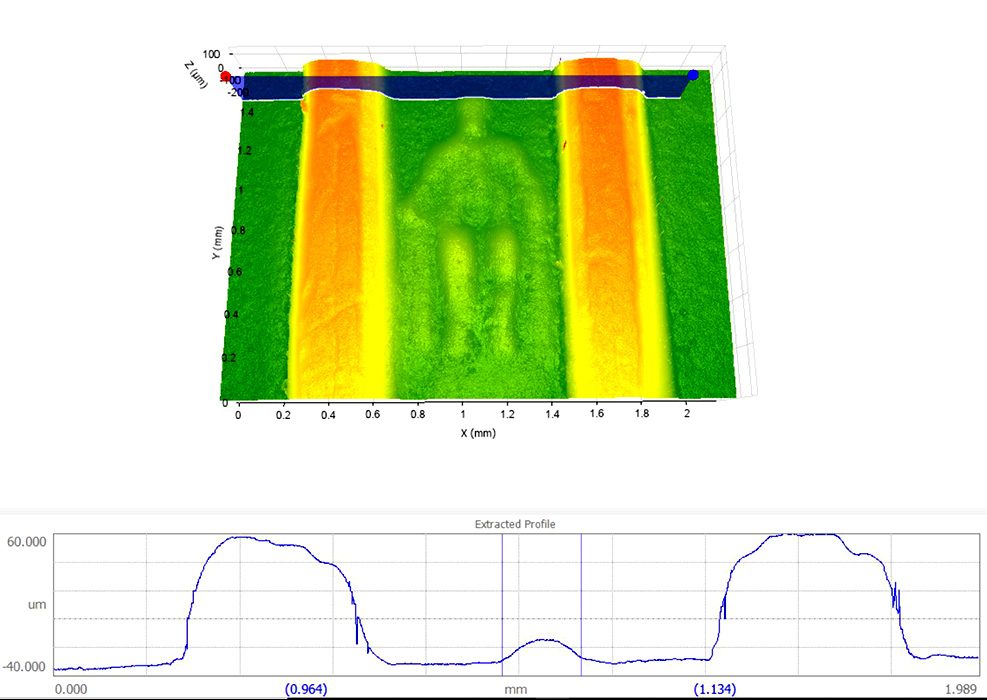
In fact, we can even see the texture on Lincoln’s face:
But, as with all good things, this resolution comes with a tradeoff: in this case, a small field of view. The image of the seated Lincoln was stitched together from six measurements acquired with a 10X objective. To map the entire surface of the penny would require us to stitch together many measurements, which would take a considerable time. However, when the application demands it, that time may be worth while for the full-field, high resolution measurement that result.
Summing things up
For calibrating a system or fine-tuning performance, a penny is no replacement for a certified lateral dimension or height standard. However, as a quick comparison of system resolutions, or as a fast verification of system performance, you can’t beat the price.
Learn more about OmniSurf3D, including all of the file formats that can be imported and analyzed.
Need help choosing a measurement system? Contact us for a consultation.

