A joint post with Michigan Metrology.
How would you measure the wear on this porous surface?
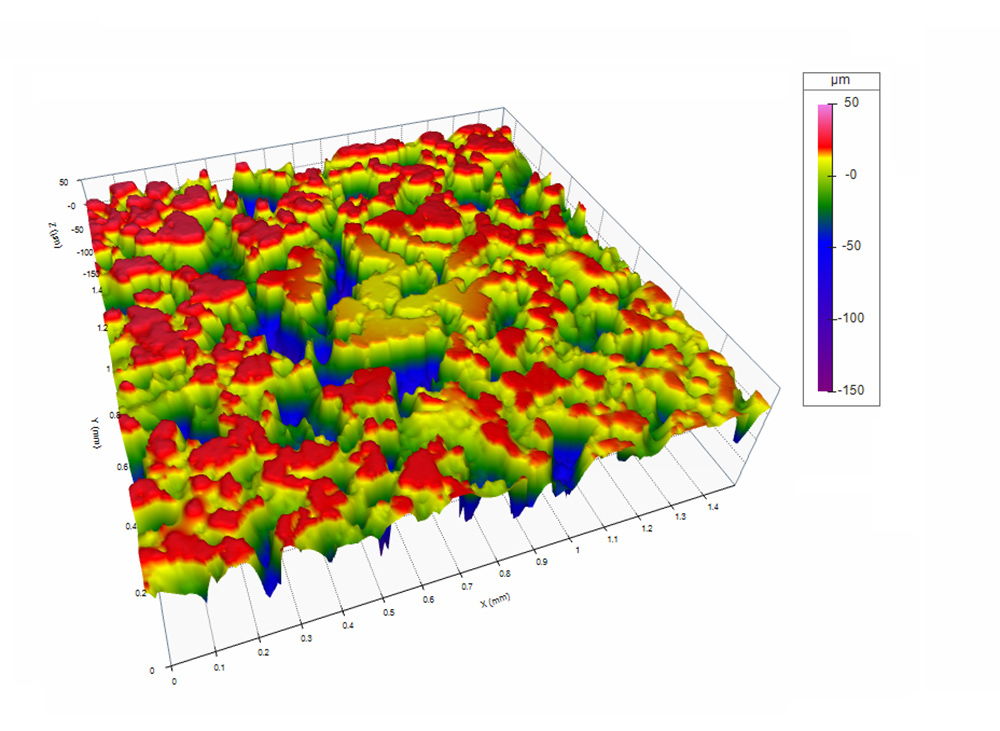
This friction material was subjected to a laboratory wear test and measured by Michigan Metrology, using a Bruker NPFlex optical profiler. It has been worn at the center, and we need to know the depth of that wear scar. But looking at the data, it’s nearly impossible to see where the wear has occurred. All we see is the porosity, and we know that the pores are not “wear.”
So, how do we separate the wear from the porosity?
Closing and Opening Filters
One way to make sense of this data is to apply a series of “morphological” filters. A morphological “closing filter” acts like a ball rolling over the surface. It can pass over peaks and down into larger valleys, but it can’t drop into the smaller valleys. By changing the size of the “ball” we can decide how much of the larger features we want to keep, and which of the finer details we want to smooth out.
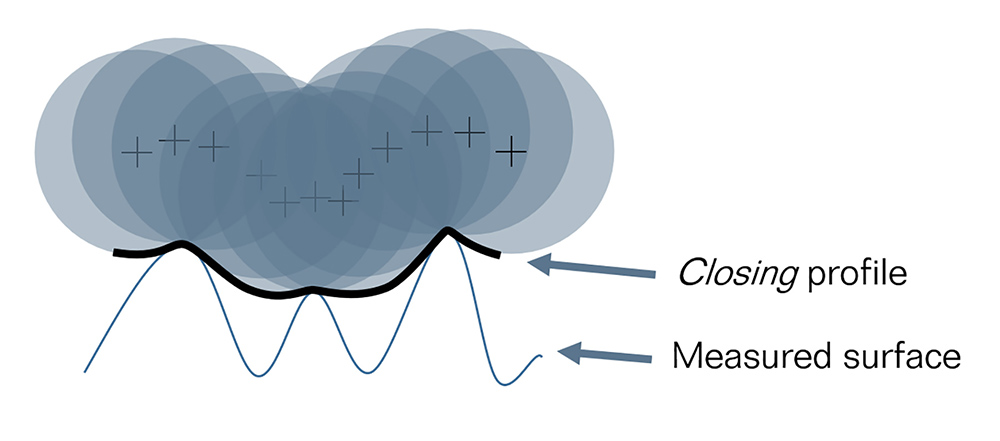
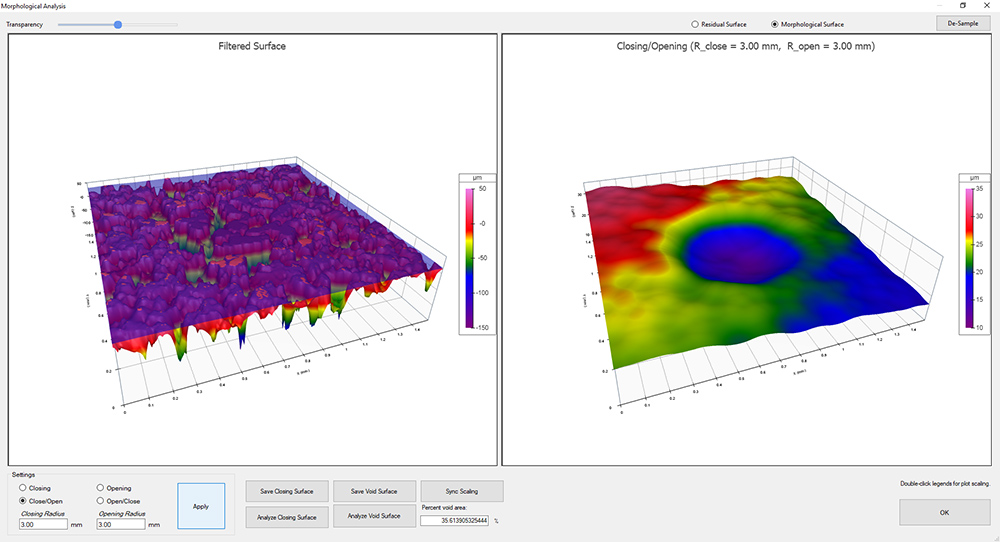
For our worn surface, we can set the filter radius so that it is large enough to span the pores but small enough to roll into the wear scar. Applying the filter with a 3mm radius (and re-scaling), the data looks like this image on the right:
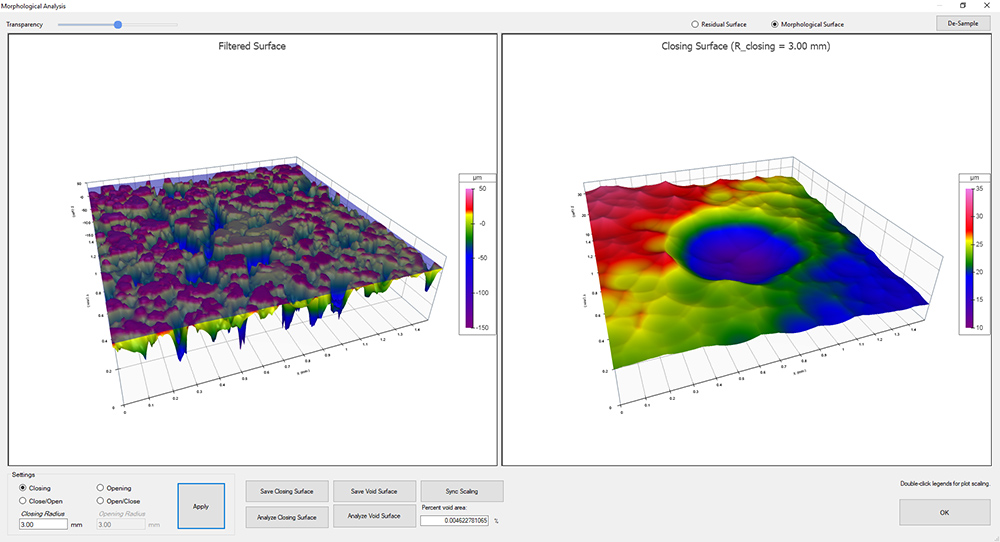
That’s a good start! We can now see the wear scar in the center. However, there’s a bit of an issue: the areas surrounding the wear crater have been artificially lifted as a result of the closing filter retaining the high, noisy peaks. A closing filter turns local peaks into sharp cusps. To solve this, we can now apply an “opening” filter to the closing surface. The opening filter acts like a ball being pushed up into the data from below.
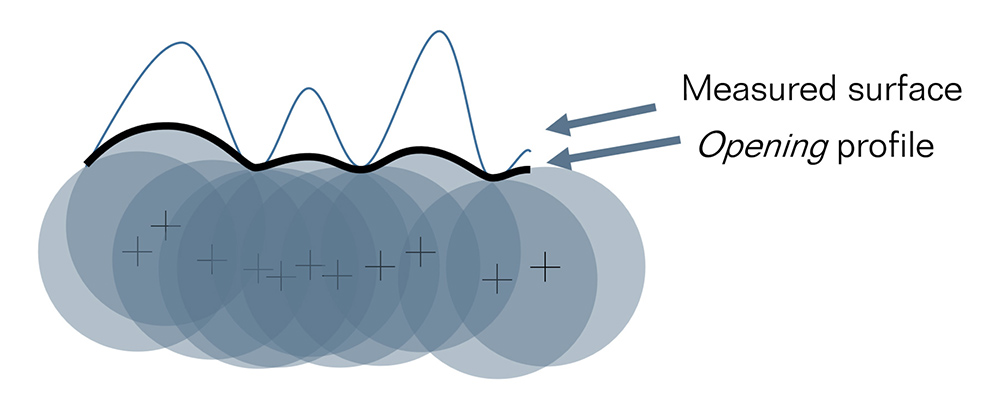
An opening filter with a 3mm radius “ball” can follow the shape of the wear scar, but it will span the ridges and local, sharp peaks. It produces a more realistic representation of the wear scar as shown here on the right.
The application of a closing filter followed by an opening filter is called an “alternating sequence,” and it is very helpful for extracting features such as this wear scar. In fact, it’s often the only way to pull such a feature out of the data!
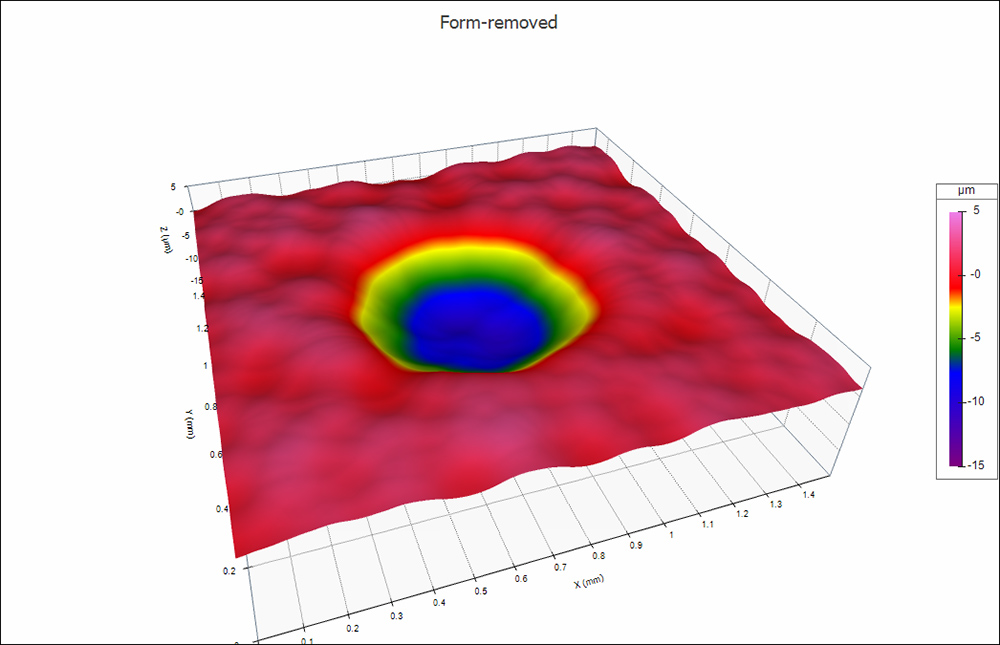
After levelling this alternating sequence surface, we can clearly see our wear scar.
Wear analysis
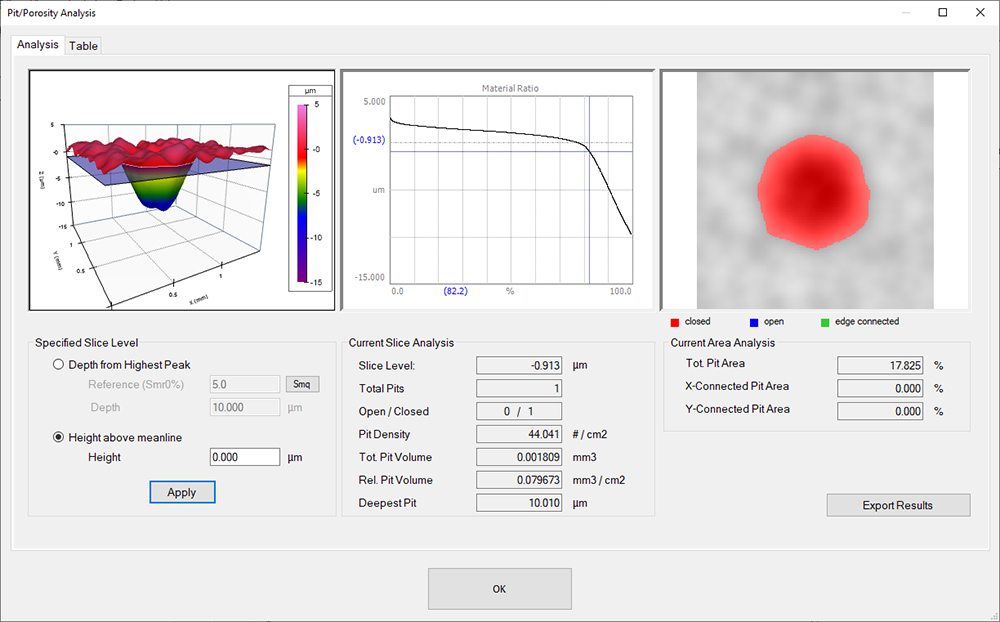
Once we have isolated the scar, we can do some analysis to calculate the amount of wear. The Pit/Porosity tool in Digital Metrology’s OmniSurf3D software is a handy way to calculate the volume of a pore below a threshold height (shown as a blue plane in the image below).
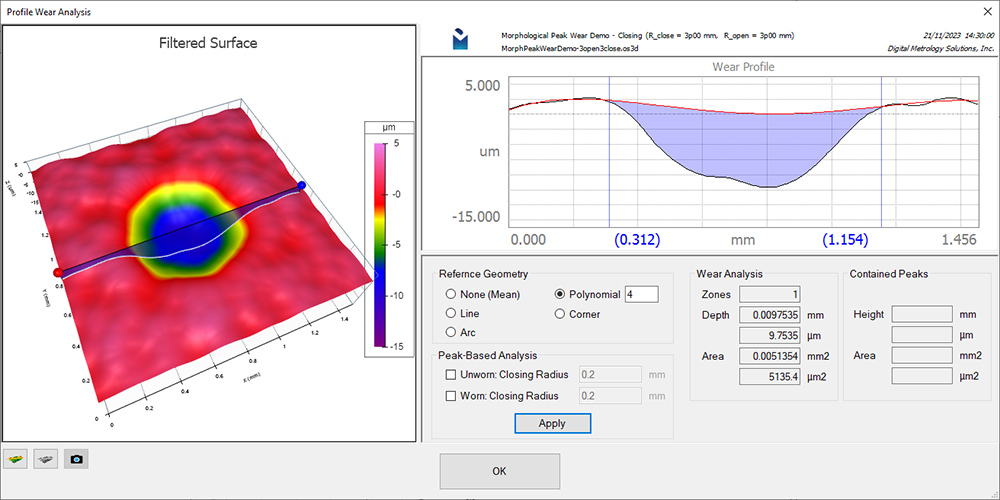
With OmniSurf3D’s Profile Wear Analysis tool, we can draw a cross sectional profile through the wear scar, then set cursors to define the edges of the crater. The analysis uses the areas outside of the crater as the “reference” surface and measure the depth and volume of the wear scar from that reference.
Opening and closing filters have many applications, making it possible to analyze features that otherwise could not be isolated.
If you’d like to know more about filtering, check out this article.