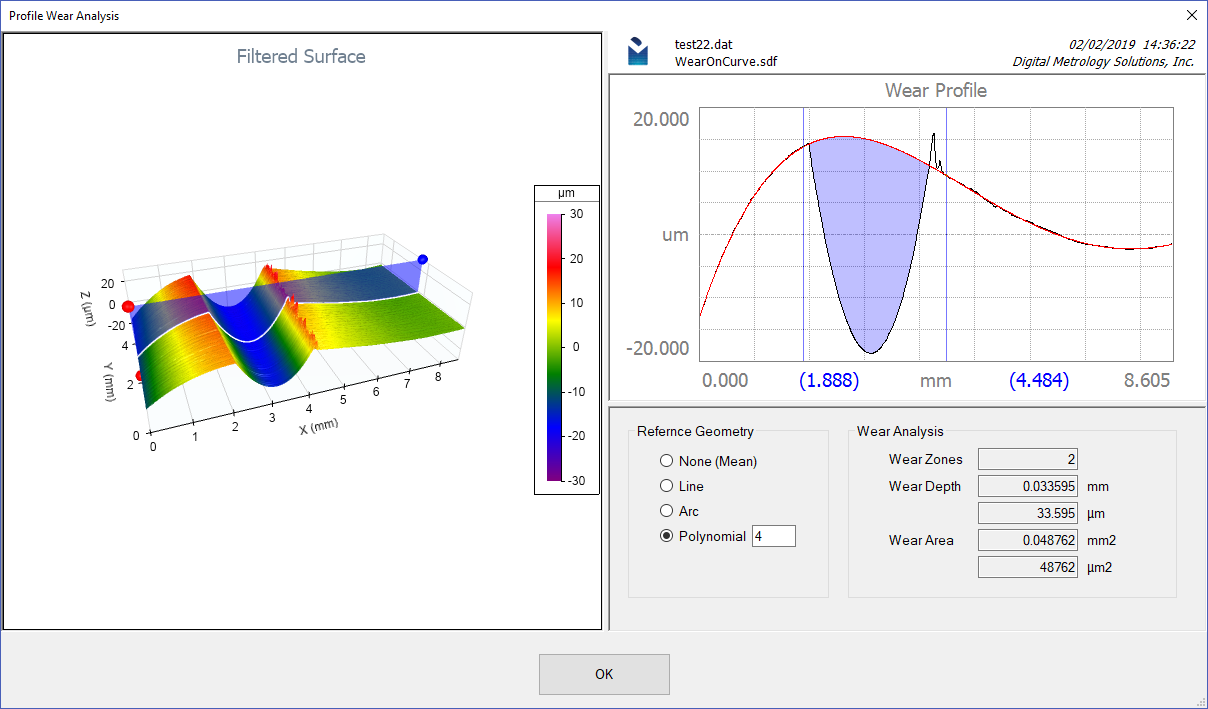
As you may have seen in this video, analyzing a wear scar on your surface is fast and easy with OmniSurf3D… even when the scar occurs along a curved surface.
However, what you may not know is that the OmniSurf3D wear analysis tool can also handle worn or chipped corners as well.
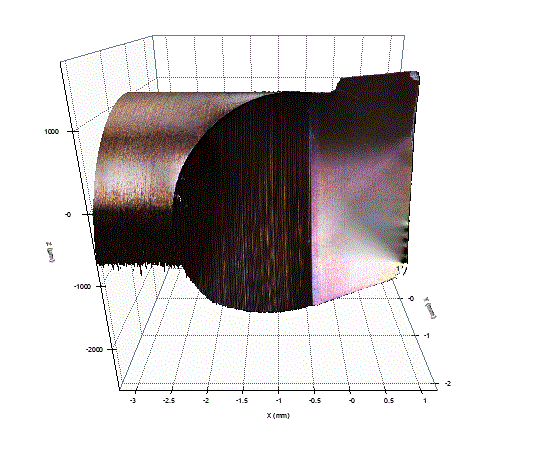
For example, let’s look at a damaged cutting tip on this small boring bar.
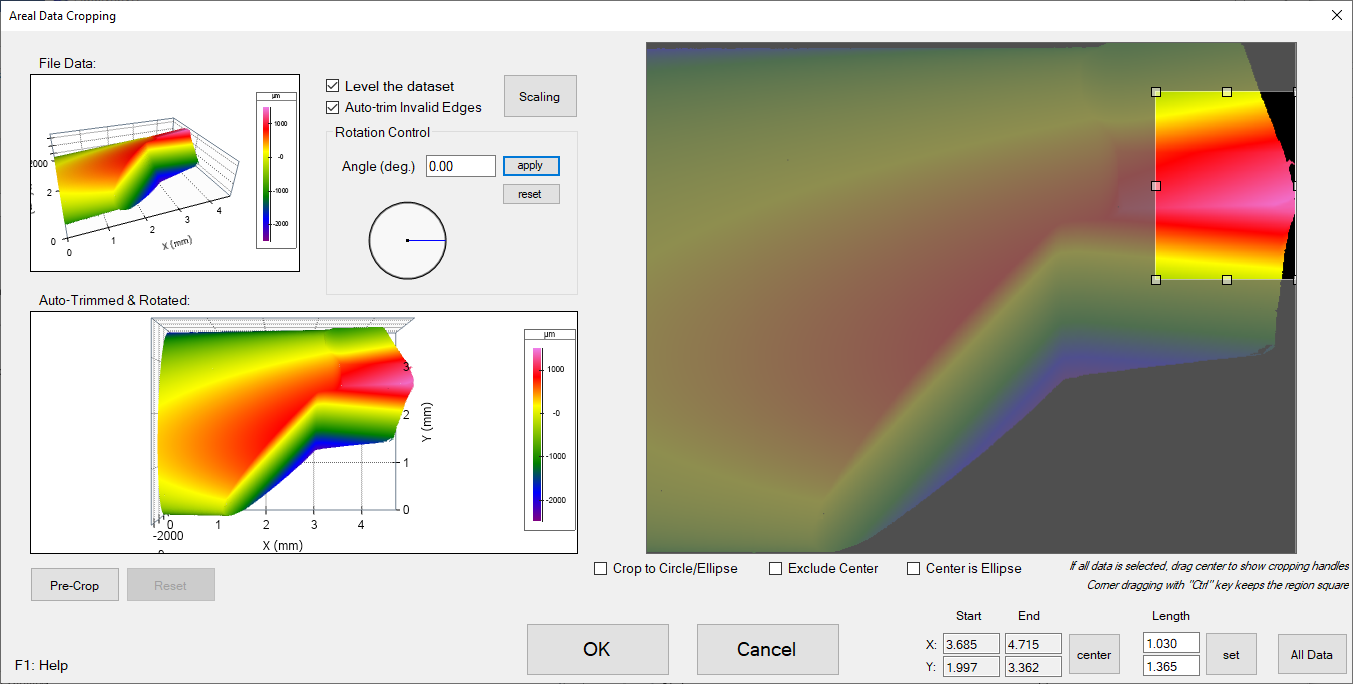
To get a closer look at the damage, we first crop the data to a smaller region of interest and use “datum” as our reference geometry (to avoid any strange levelling due to fitting of planes or other features).
The depth of this chip in the cutting tool cannot be related to a single line or curve. Instead, it relates to the two flank angles. Thus, we select OmniSurf3D’s Profile Wear Analysis tool and choose “Corner” as our reference geometry.
The 3D view on the left lets you select the entire profile—including the unworn edges and a worn region in the middle. The two, vertical (blue) cursors on the right plot isolate the worn/chipped region from the unworn edges.
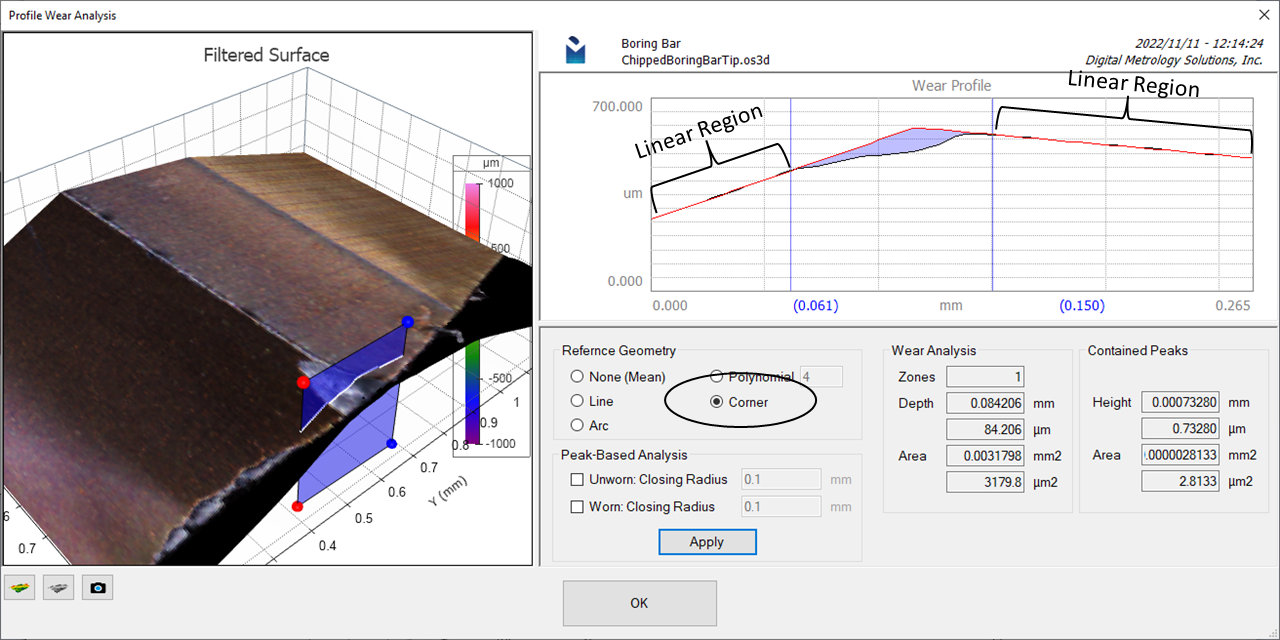
With this powerful tool we can quickly see the depth and volume of the tool damage.
This dataset is available here in Digital Metrology’s Surface Library. Download the data and see for yourself just how easy and informative it is to measure and understand wear or damage on a corner.
Want more information? Reach out to us here. We are glad to help!