To measure surface texture accurately we need to be able to separate it from the underlying shape. Most surface texture software can remove simple shapes such as tilt and cylinder. Complex surface shape, however, can prove difficult to handle in a lot of software.
OmniSurf3D includes a number of flexible tools to handle complex shape. A recent project serves as a great illustration for how these shape removal tools can tame a difficult surface and simplify the analysis process.
About the Sample
The data in the example below was sent to us by Assistant Professor Alp Eren Şahin from the Mechanical Engineering Department of Kocaeli University in Kocaeli, Turkey. Dr. Sahin and Dr. Tamer Sınmazçelik are studying wear mechanisms. Traditionally, wear is calculated based on mass loss, but the team wanted instead to consider both mass loss and plastic deformation damage—to calculate not just the volume of material that is scraped off, but also the amount that is plastically deformed.
The sample dataset below shows a wear scar formed on a particle reinforced thermoplastic composite. This surface was worn by solid particle erosion at a 90° impingement angle. The 3D data was acquired with a GelSight non-destructive measurement system.
Want to try it yourself? Download this dataset from our Surface Library.
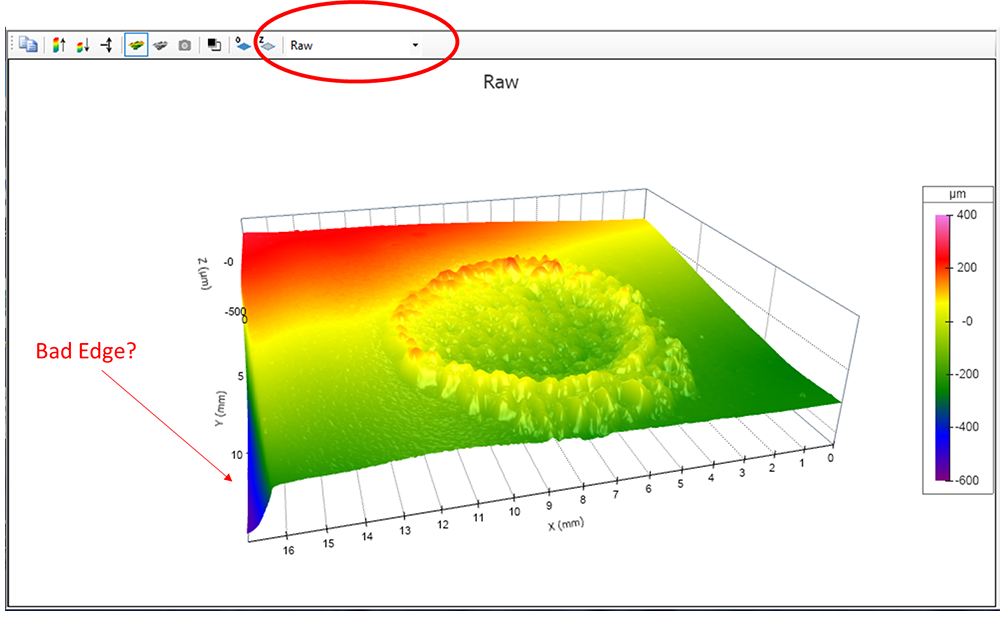
Several aspects of this data pose particular challenges:
- a “bad” edge region in the lower left
- tilt across the dataset
- additional underlying curvature
- the extreme heights and depths in the region of interest.
We show how to address each of these issues below.
Crop out bad data
The left edge of the data appears to fall away from the main plane. Whether it is a correctly measured feature or an artifact, This area is irrelevant for measuring the height of the wear scar relative to the background. Therefore, we can crop that part of the data by choosing Analysis > Data Cropping Tool, or by clicking the Data Cropping toolbar button:

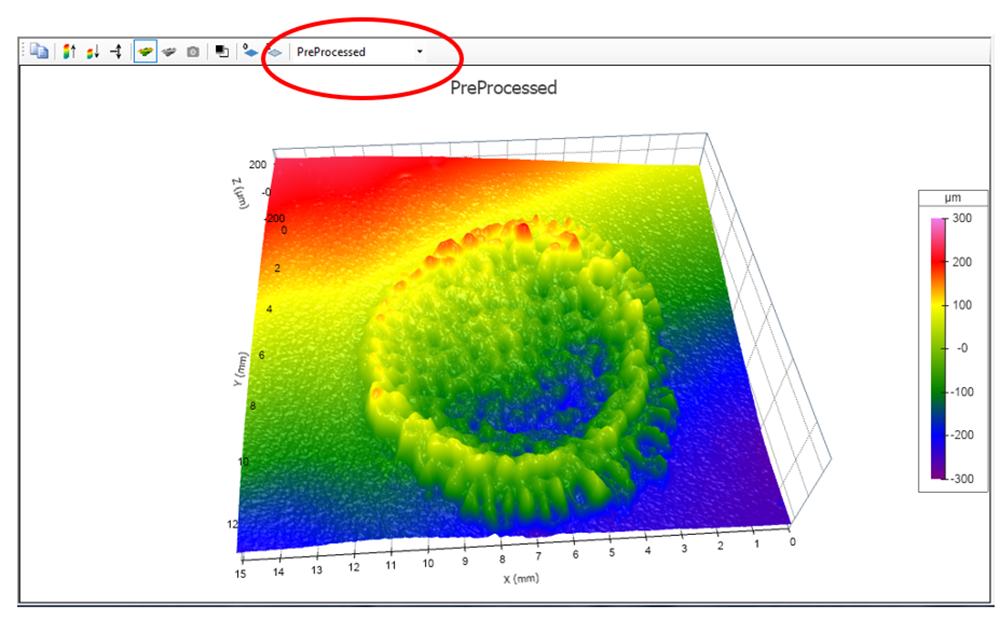
In the large view on the right side of the Data Cropping window, drag the handles to select the good data:

After clicking OK, the “Pre-Processed” data shows the cropped surface.
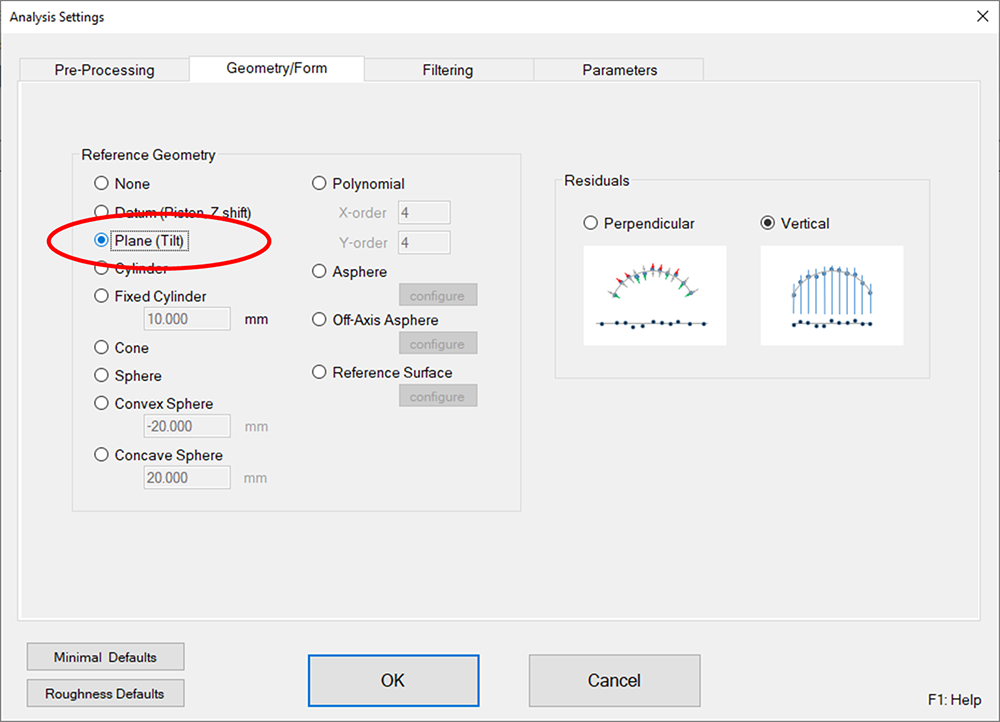
Remove tilt
The overall shape of this data is essentially a tilted plan. To remove that tilt, choose Analysis > Settings, then select the Geometry/Form tab. In the Reference Geometry area choose “Plane” for levelling a surface that is nominally flat:
After clicking OK, we can now see the fitted plane inside the surface by viewing the “PreProcessed+Geometry.”
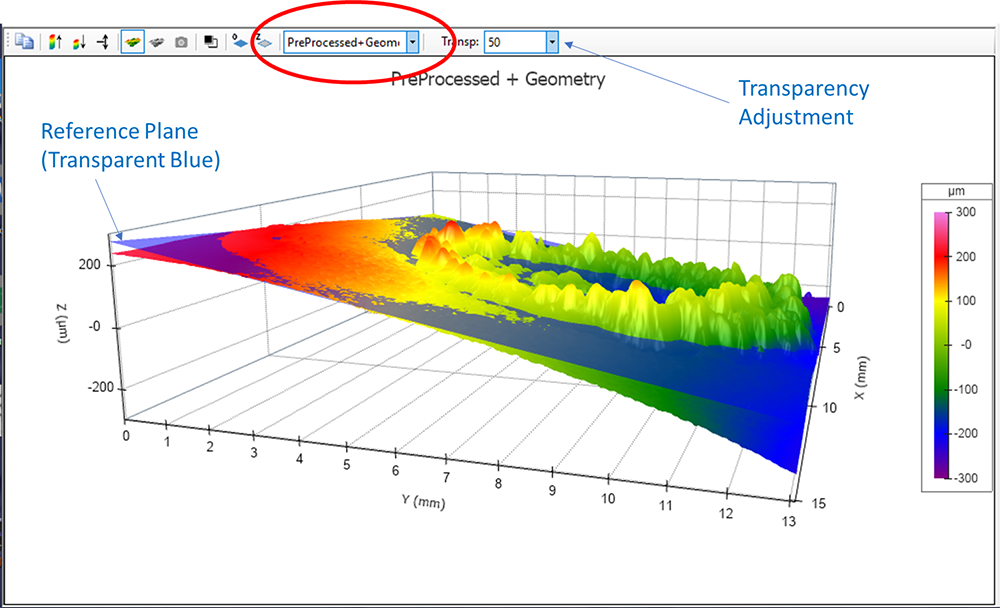
we can also see the levelled data by choosing “Form Removed”:
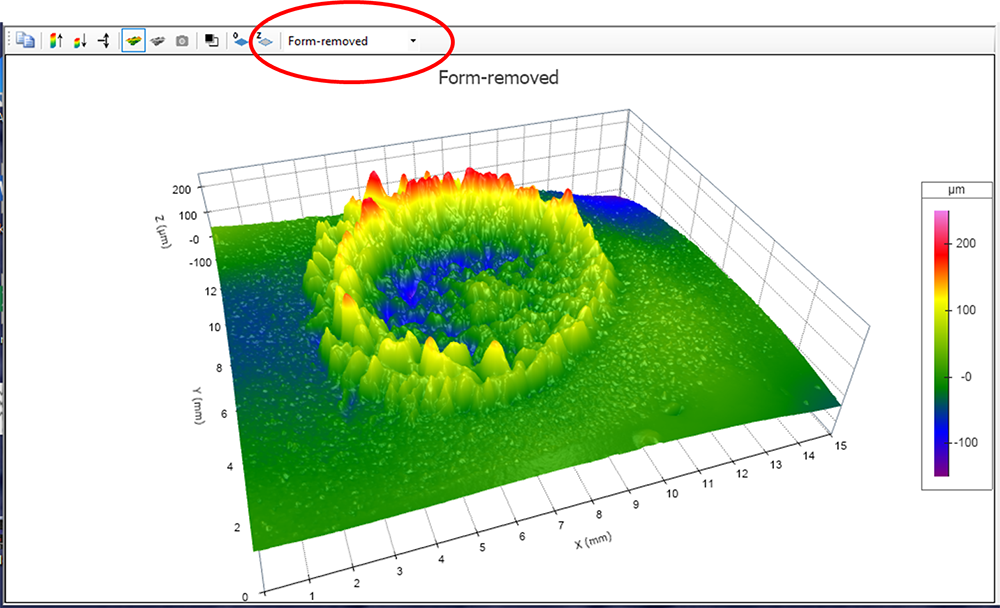
Filter out waviness
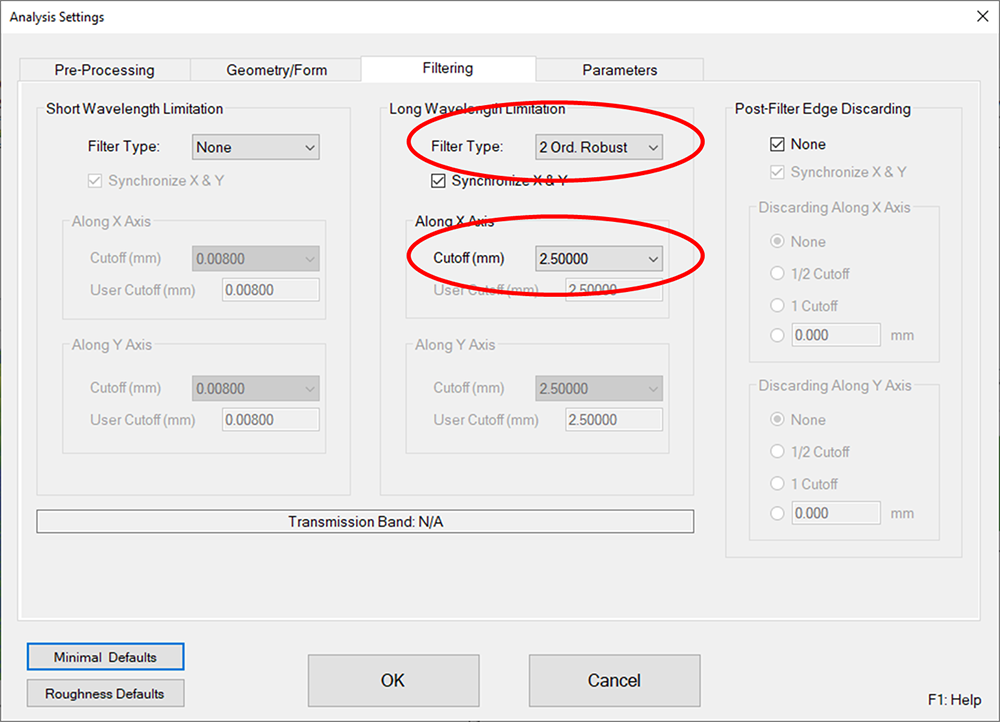
After removing the tilt, some underlying curvature/waviness remains. We can address this by applying a “long filter” to suppress the longer wavelengths while leaving the shorter wavelengths associated with the wear scar. To do so, choose “Analysis Settings,” then click the Filtering tab.
There are a several options for the long filter. First is the Filter Type. The 4th order Polynomial is often a good option for removing overall waviness. In this case, however, the data is dominated by the wear scar rather than the background. The 4th Order filter will try to conform to the sharp, raised peaks of the wear scar rather than to the background plane, which will result in the scar heights being underreported. A 2nd order Robust filter will do a better job with this dataset. We used a 2.5 mm cutoff wavelength for the filter, though some adjusting may provide a further improved fit.
NOTE: Robust filtering is mathematically intensive and can take a considerable amount of time to complete. If full resolution is not required, one could de-sample the data (Analysis > De-Sampling) to reduce the size of the dataset and greatly increase the processing speed.
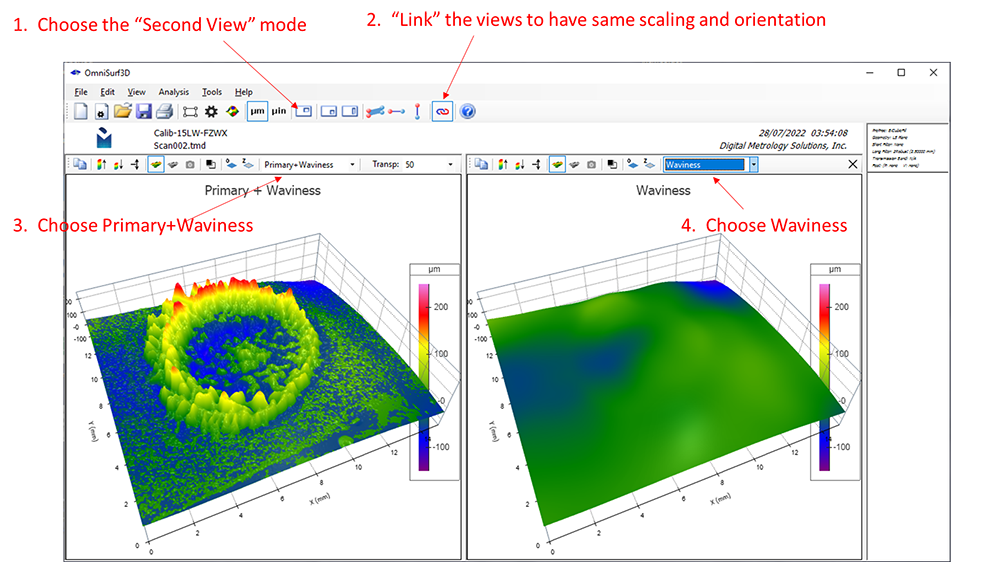
Once the filtering is complete, we can use a dual view to better visualize how the filter worked. Click the “Show/Hide Second Plot” toolbar button ![]() to toggle on the “Second View” of the data. View “Primary+Waviness” on the left and “Waviness” on the right.
to toggle on the “Second View” of the data. View “Primary+Waviness” on the left and “Waviness” on the right.
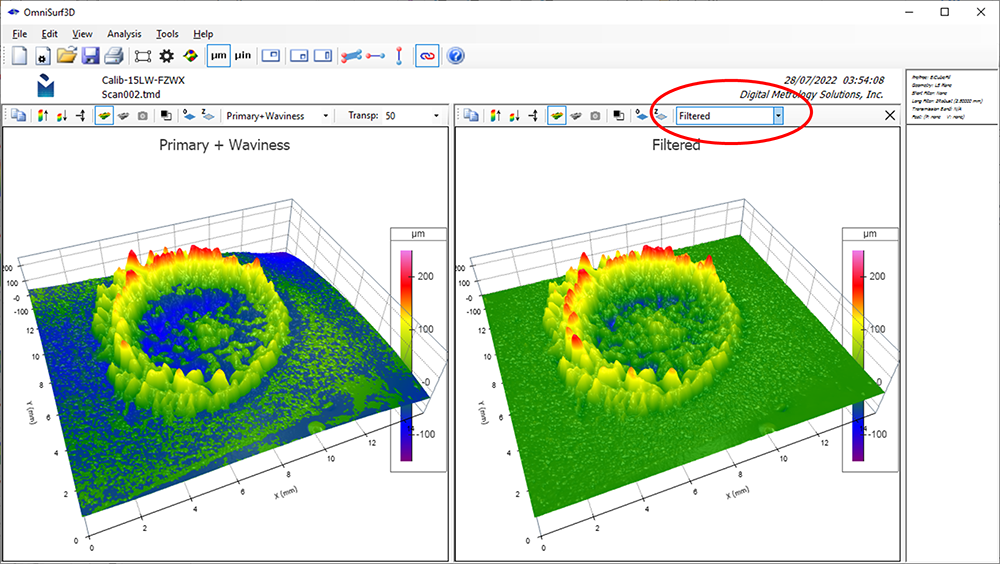
You can also view “Filtered” data with the waviness removed. “Filtered” data is used for all of the analyses under the “Tools” menu.
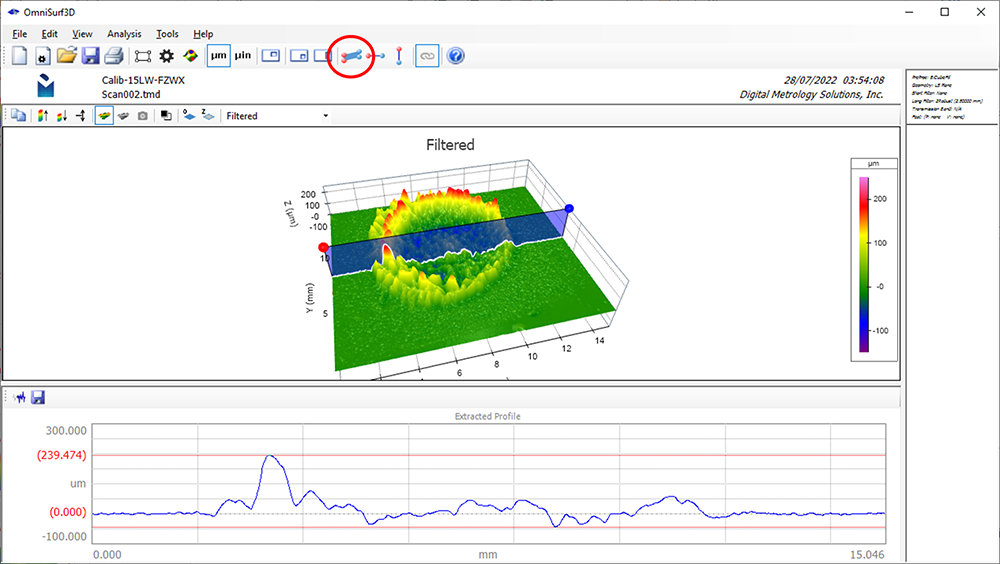
Apply analysis tools
Now that we have a filtered dataset, we can apply a cross section tool or use any of the options in the “Tools” menu to analyze the data further:
When you come up with analysis settings that you like, you can save them by choosing “File > Settings > Save Settings” and re-load them by choosing “File > Settings > Load Settings.”
Additional settings
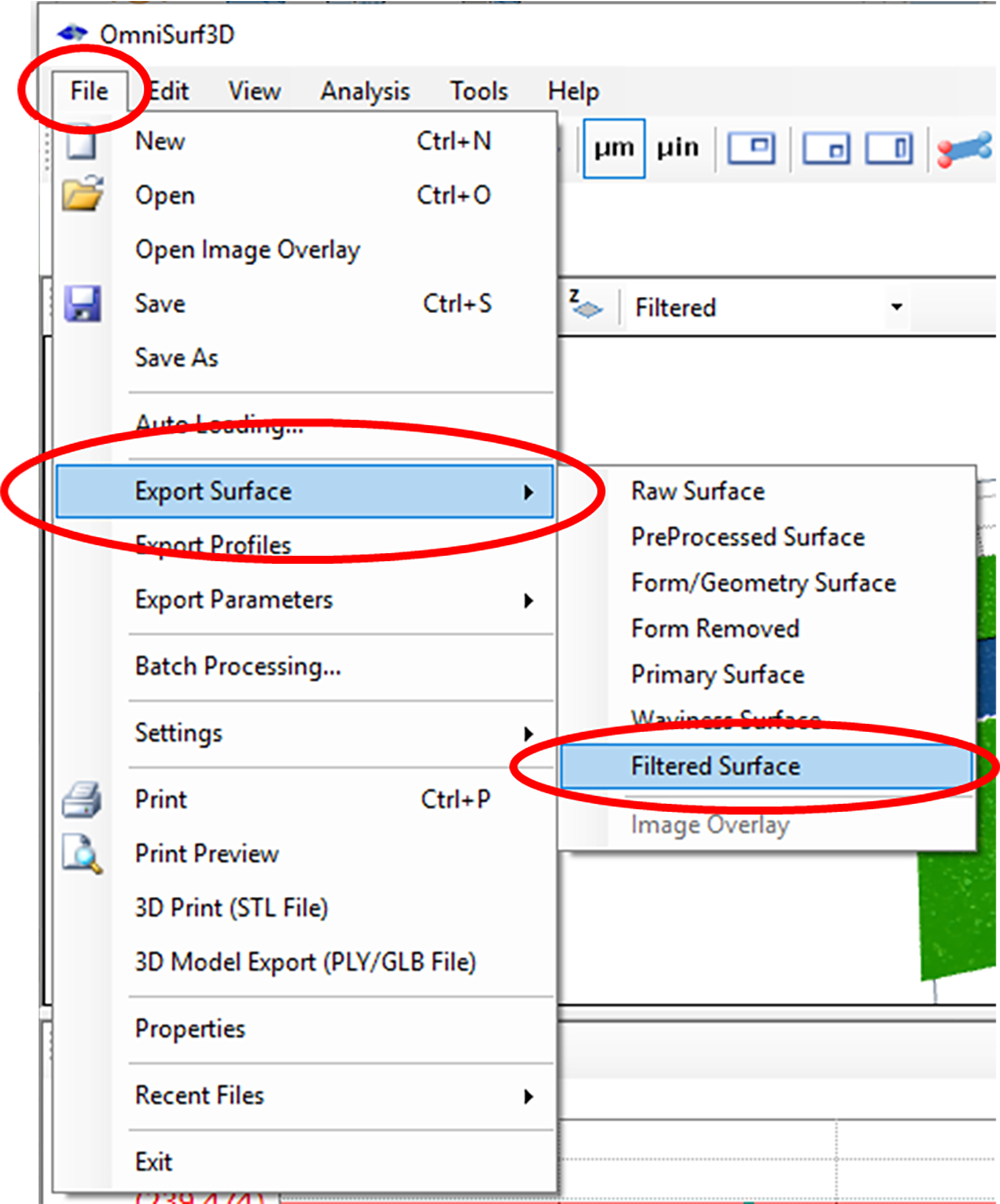
Since the 2nd order robust filter takes a long time to compute, it might make sense to export the filtered surface for fast and easy future explorations. To do so, choose “File > Export Surface > Filtered Surface:”
This way when you want to re-analyze the data in the future, you can simply turn off the levelling and filtering and re-load the already-filtered data. Be sure to keep the original data as well.
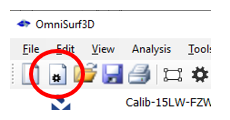
Prior to loading data that has already been filtered, you can quickly clear all settings by clicking the “New Settings” toolbar button:
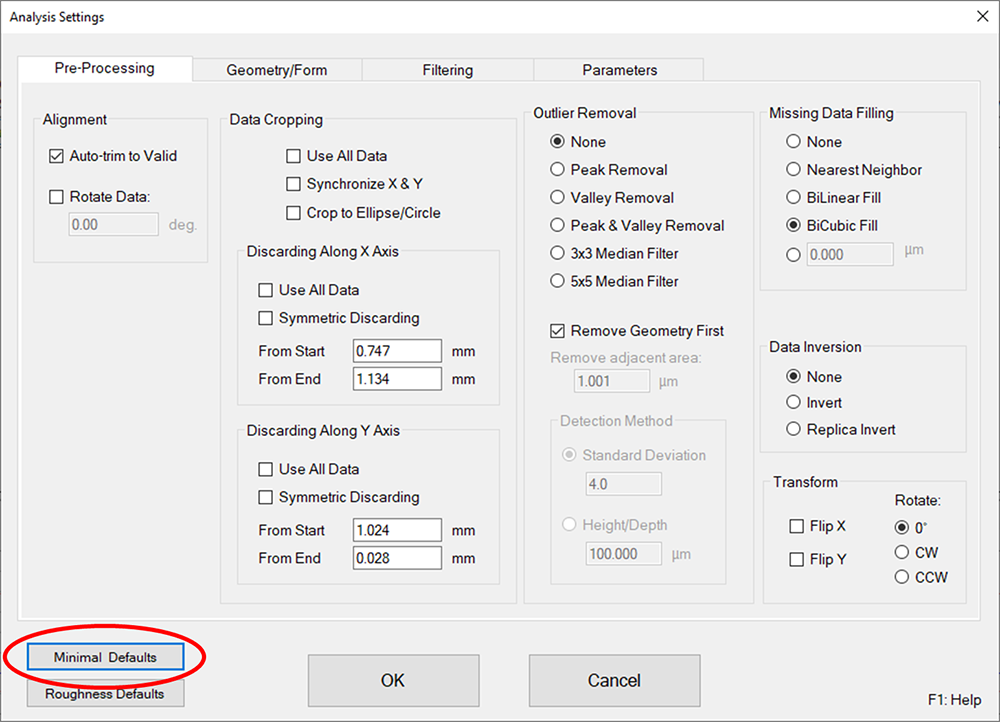
You can also clear the settings from inside the settings dialog by clicking the “Minimal Defaults” button:
Want to try it yourself? Download this dataset from our Surface Library.
All data and images in this post are courtesy of Asist. Prof. Alp Eren Şahin and Prof. Dr. Tamer Sınmazçelik from the Mechanical Engineering Department of Kocaeli University in Kocaeli, Turkey.
Thanks to Hakan Erdogan of 6 Nokta for his assistance.
Want to know more about analyzing data in OmniSurf3D? Check out our Videos and Tutorials pages, or Contact us to help with your challenging surfaces.