Here’s a challenging measurement. We want to look at the surface texture of this O-ring:
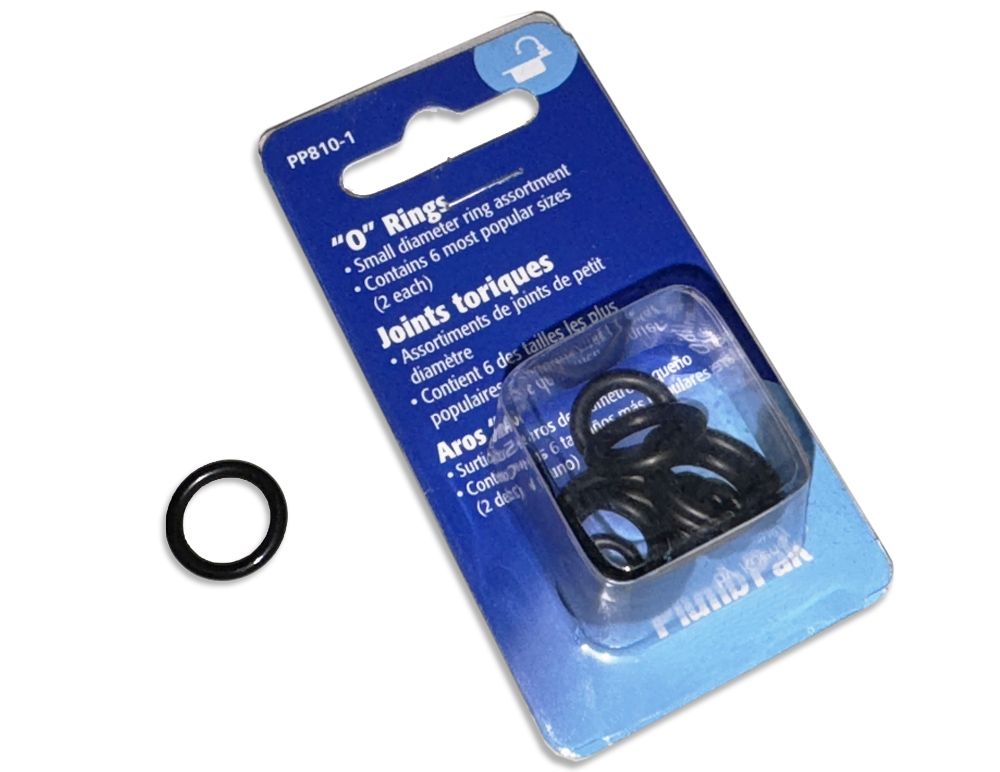
With a small radius and cross-section, steep sides, and soft material, it’s almost impossible to measure with a stylus. An optical system can do the job, though. Here’s a measurement made with a Zygo ZeGage at 10X magnification, shown in OmniSurf3D:
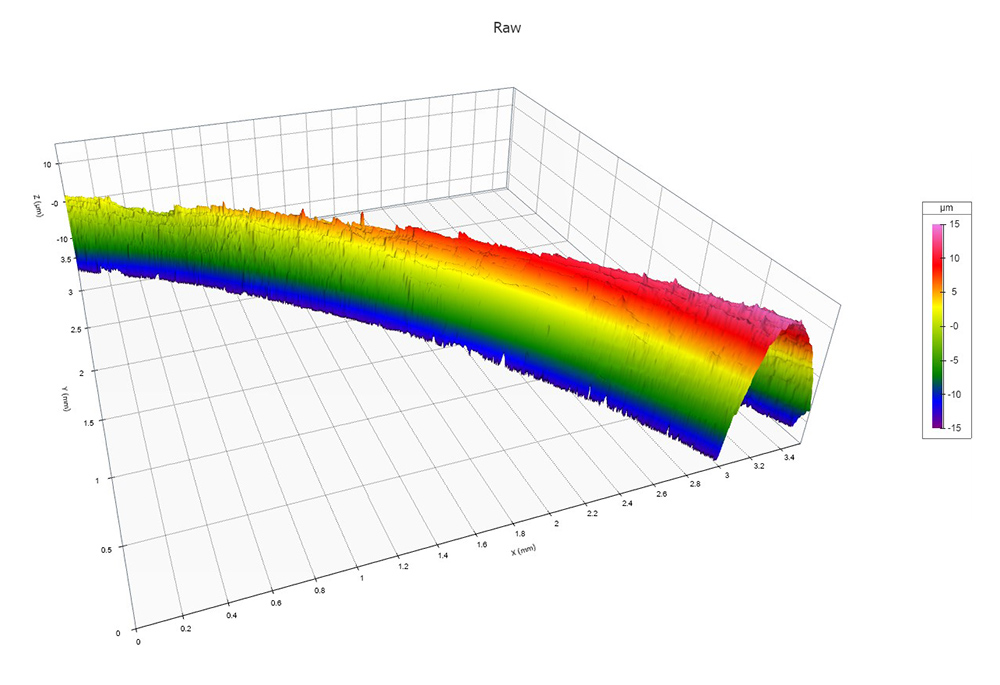
But acquiring the data is just the beginning! Here are some tips for how to analyze a challenging surface like this. If you’d like to try it for yourself, the data is available for free in our Surface Library, and you can download a free 10-day trial version of Omnisurf3D software here.
Removing Geometry
To analyze the surface texture, we first need to remove the underlying geometry. Typically, we would start by removing a simple geometry such as a plane or cylinder…but if we look at the PreProcessed + Geometry view in OmniSurf3D, we can see that neither one of these geometries fits the surface well at all.
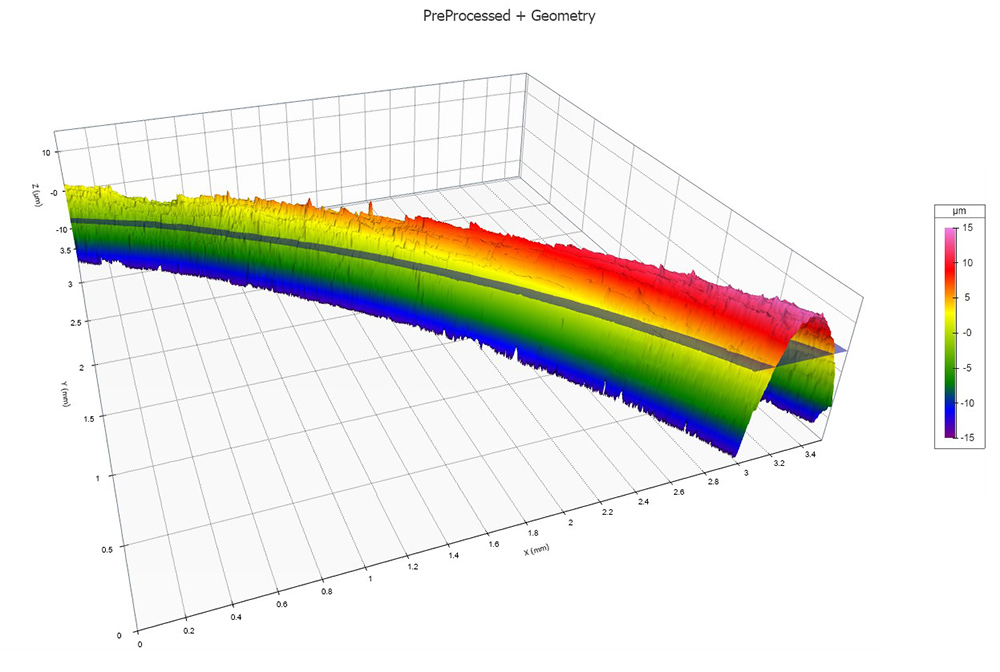
Plane Fit
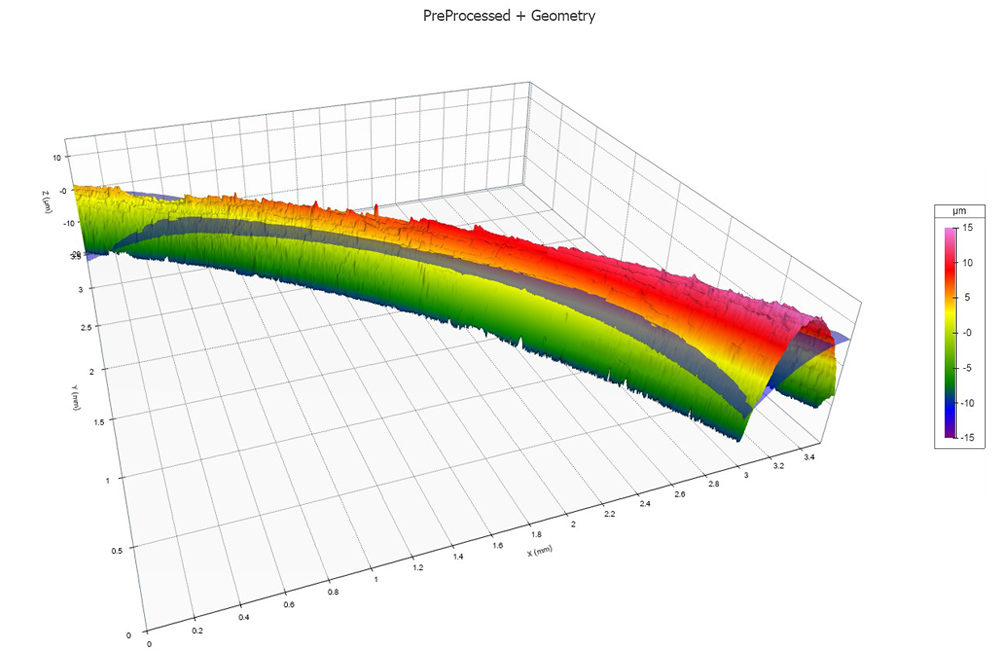
Cylinder Fit
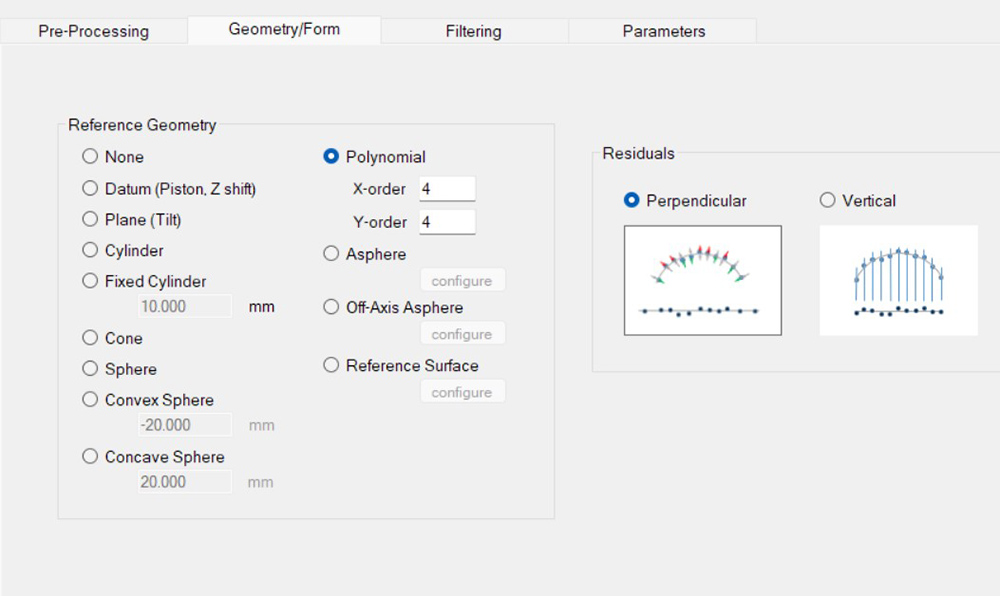
For a complex surface like this, a 4th order polynomial fit in both the X and Y directions follows to the data much better:
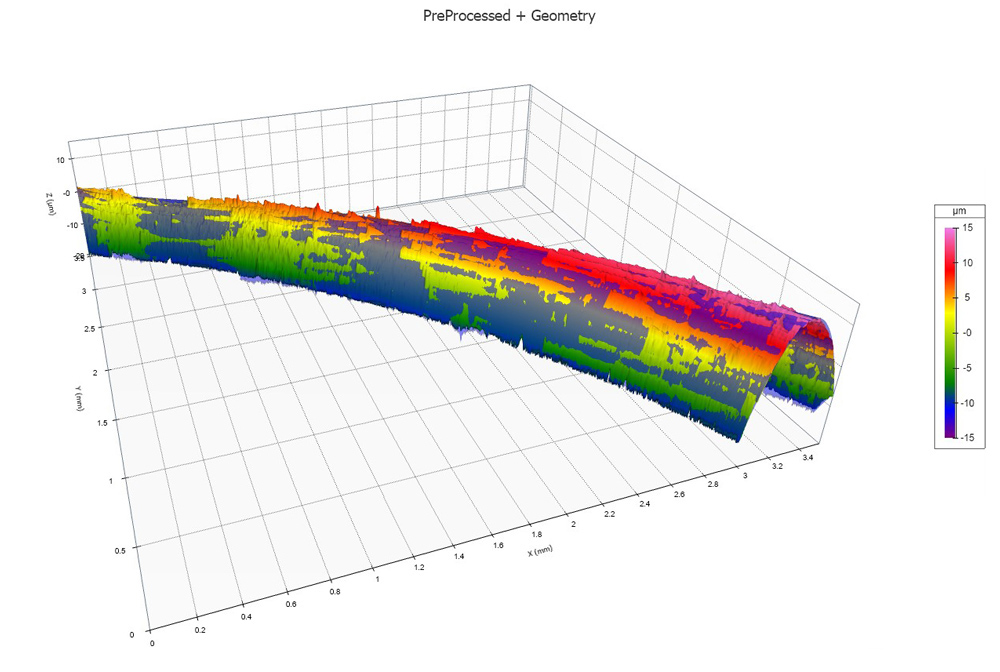
4th Order Polynomial Fit
Perpendicular Residuals
There’s an important aspect of geometry removal that comes into play with this surface. The “residuals” are the measured variations in height from the ideal geometric shape. “Vertical” residuals are measured as if the surface was being mapped, point by point, “straight down” to a plane beneath the surface. But for this o-ring, which has such steep sides, this kind of mapping would compress the shape at the edges.
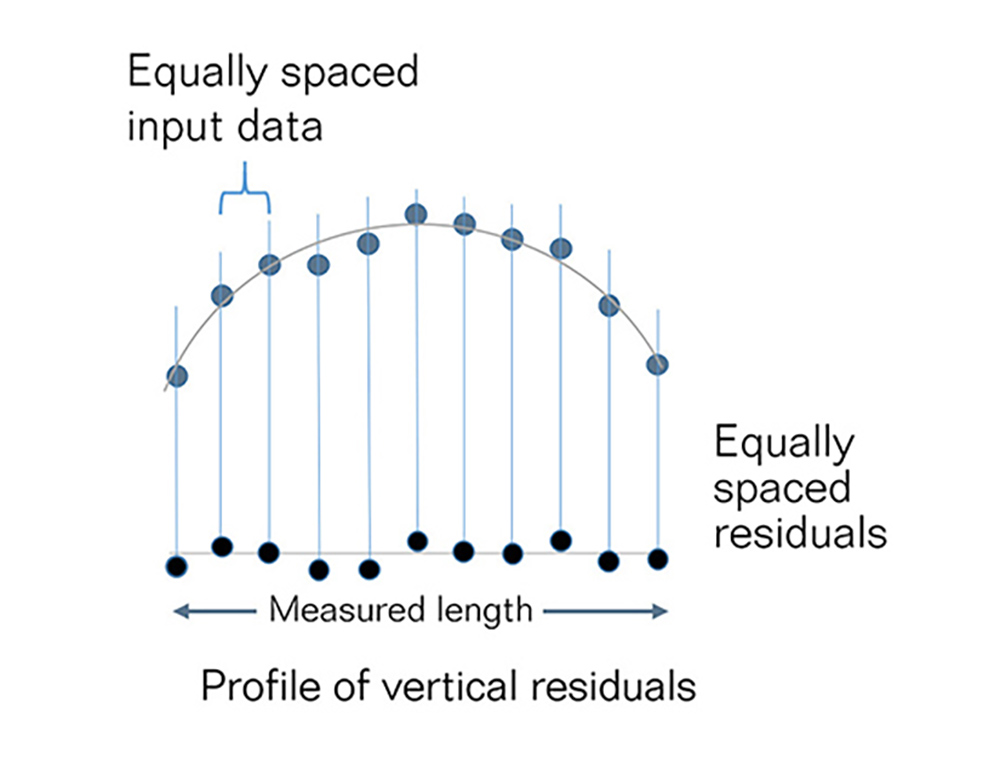
“Perpendicular” residuals, on the other hand, are measured at ninety degrees to the surface at each point, as shown below.
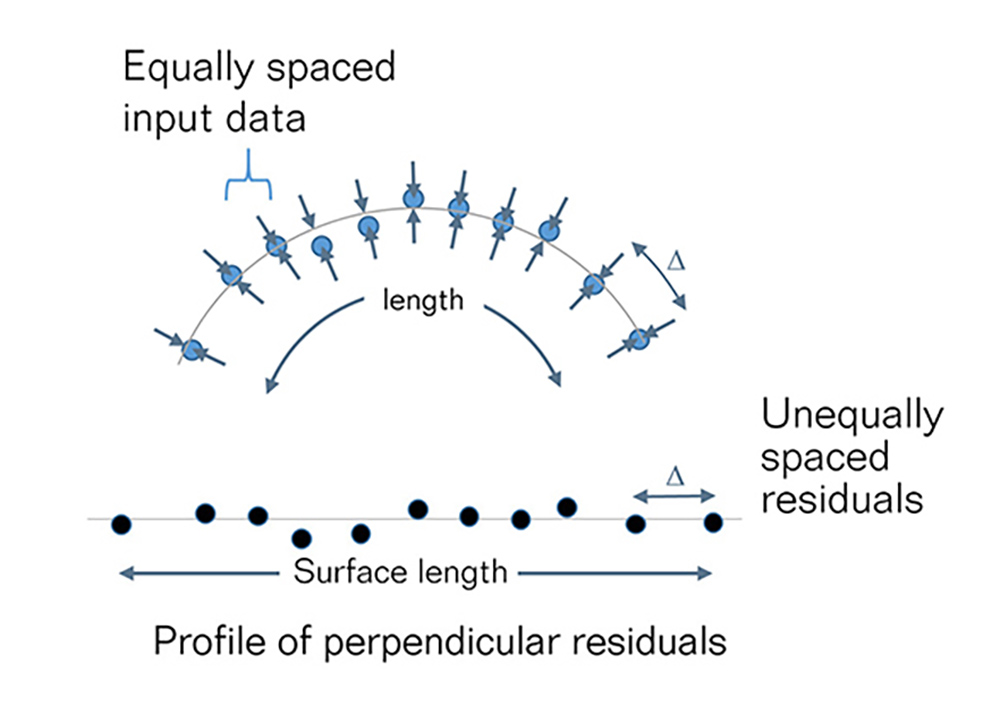
For a surface with steep sides, like this O-ring, perpendicular residuals will give much more accurate results across the whole cross-section. Here is a summary of the Geometry/Form Removal settings in OmniSurf3D:
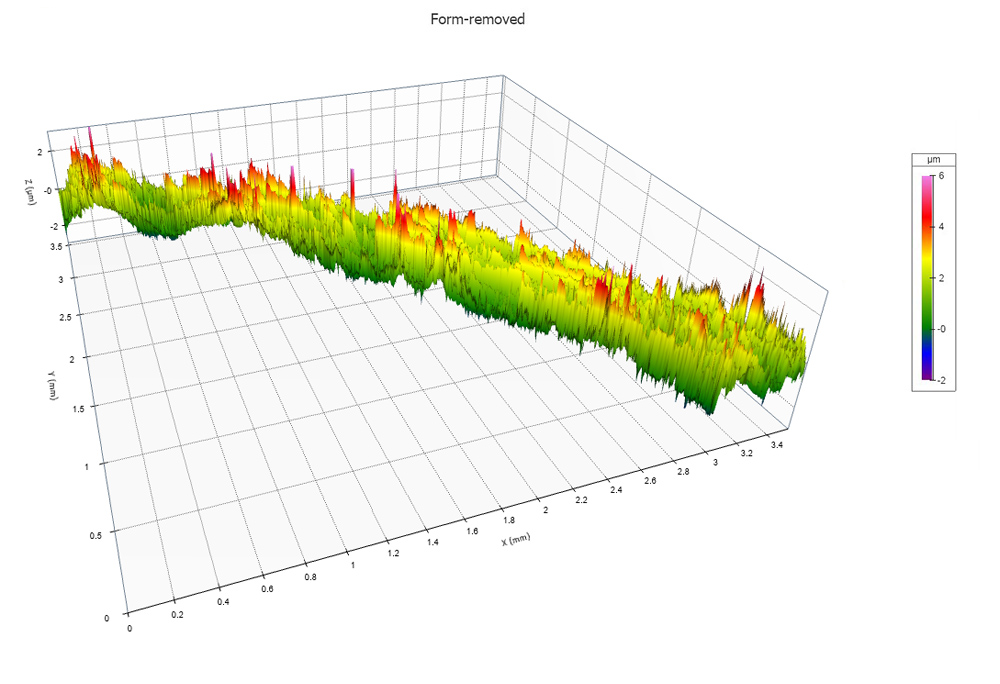
And here is the surface with that geometry (form) removed:
Filtering
In the form-removed data above, we can make out larger-scale “waviness” along the circumference, as well as finer texture along and across the surface. Both aspects of the texture may impact how the O-ring will seal, and we can “filter” the data to explore these aspects independently.
In the Primary+Waviness view, we get a better view of the larger-scale “waviness” hiding in the texture. We can open a second view and show just the Waviness to isolate the shape.
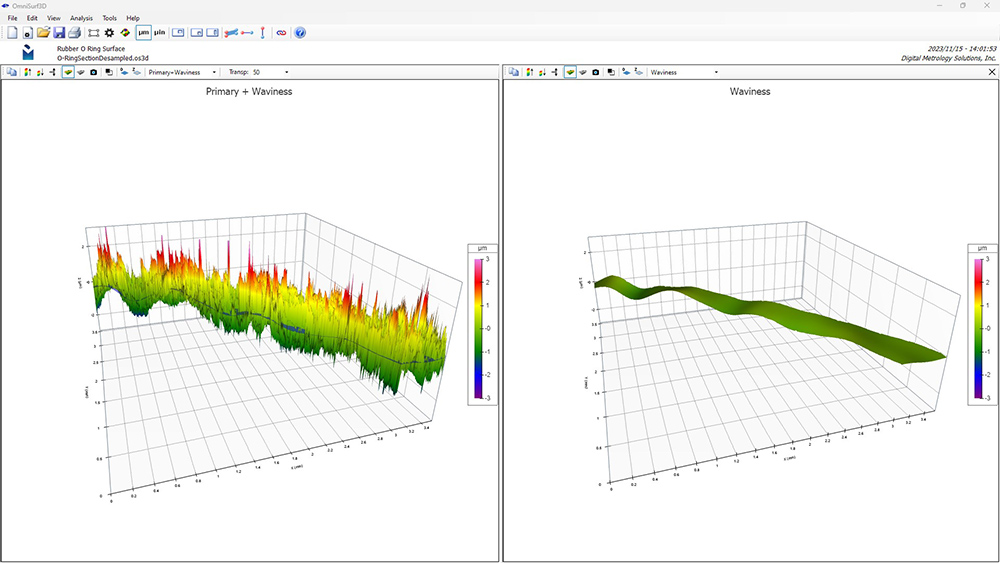
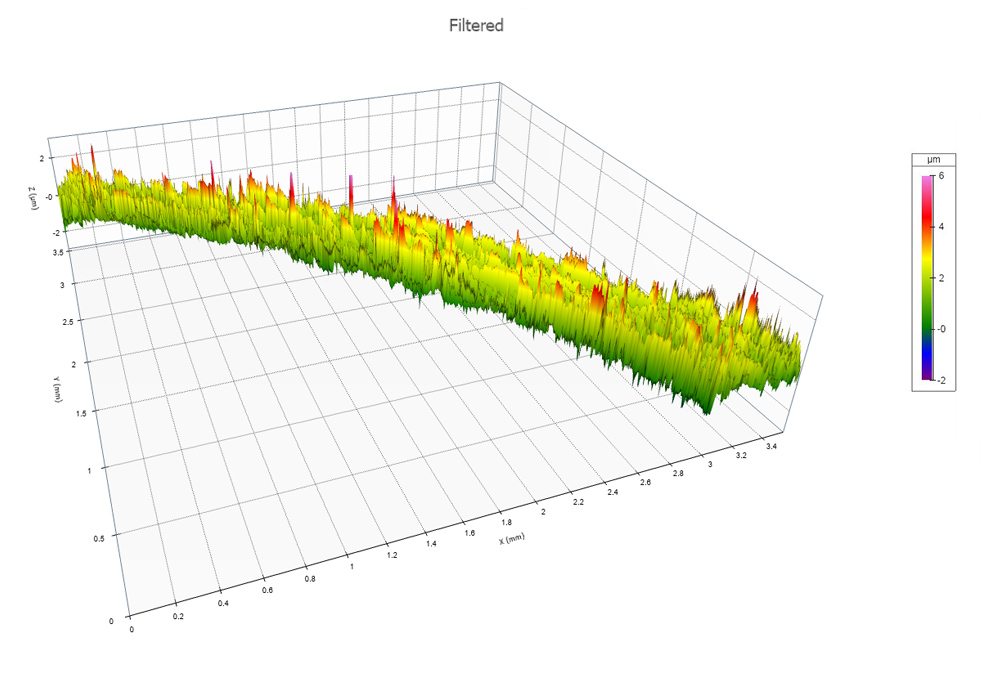
We can also subtract out that waviness to look at just the finer roughness. In this case, applying a 0.25 mm Gaussian long filter removes the longer wavelength shape so we can see the roughness. Here is the filtered data:
OmniSurf3D makes it very easy to explore surface texture, even on complex shapes like this. Try it out for yourself today! The free, 10-day trial, and loads of videos and tutorials, will help you get started quickly.
